SA,
I'm going to share some tips I learned through the time I've spent with developing Windows Phone apps.
and here is the first one:-
and here is a dummy sample
-first (the normal view)
and then the user can drag the black rectangle(it could be a better image with arrows :D) up and down to be like:
and
 The user can drag and the other content will change it's size dynamically, and can scroll both of them.
We will split our ContentPanel Grid into two parts
we are going to tell it that it will have tow rows
just TextBlock inside ScrollViewer.
and the bottom content:-
will split it into two rows; for the black rectangle and the bottom comment.
first part:-
and the content will be also TextBlock inside ScrollViewer
and here is the code:-
what happens is we change the height of the bottomGrid, and the TopGrid will take the space.
Full Source Code:
https://github.com/mostafa-elabady/ScrollableContentWP8
Have fun :D
I'm going to share some tips I learned through the time I've spent with developing Windows Phone apps.
and here is the first one:-
Intro:-
sometimes you want to build a scroll-able page, for example a page that is divided into two sections (article and a comment) and you want to let the user change the size of each part smoothly.and here is a dummy sample
-first (the normal view)
 |
| Normal View |
 |
| more space for the comments |

How can we do that?!
just create a new simple Windows Phone project,We will split our ContentPanel Grid into two parts
we are going to tell it that it will have tow rows
<Grid x:Name="ContentPanel" Grid.Row="1" Margin="12,0,12,0">
            <Grid.RowDefinitions>
                <RowDefinition Height="*"/>
                <RowDefinition Height="Auto"/>
            </Grid.RowDefinitions>
and add the top Grid:
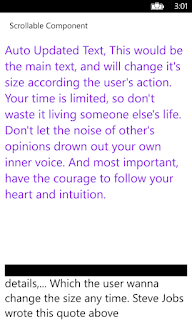
<!-- Top Grid -->
<Grid Background="White" Margin="0,0,0,12" Grid.Row="0">
<!-- Scroll Viewer, to let the user scroll -->

<ScrollViewer>

<TextBlock FontSize="30" TextWrapping="Wrap"

   Text="Auto Updated Text, This would be the main text,
   and will change it's size according the user's action.
   Your time is limited, <so don't waste it living someone else's life.
   Don't let the noise of other's opinions drown out your own inner voice.
   And most important, have the courage to follow your heart and intuition."
   Foreground="BlueViolet"/>

</ScrollViewer>

</Grid>
just TextBlock inside ScrollViewer.
and the bottom content:-
<!--Bottom Grid-->
            <Grid Grid.Row="2"  x:Name="BottomGrid" Height="240" >
                <Grid.RowDefinitions>
                    <RowDefinition Height="30"/>
                    <RowDefinition Height="*"/>
                </Grid.RowDefinitions>
will split it into two rows; for the black rectangle and the bottom comment.
first part:-
<!-- Scroll Viewer, here where the magic happens :D
 you can change the balck with any beatufel image with arrows(Up and Down) -->

<ScrollViewer Grid.Row="0" ManipulationDelta="ScrollViewer_ManipulationDelta_1"
                 Height="30" Background="Black"/>
and the content will be also TextBlock inside ScrollViewer
<!--Bottom Content-->
<ScrollViewer Grid.Row="1" >
                 <TextBlock FontSize="28" TextWrapping="Wrap"
                               Text="Bottom Text, This would be comment of
                                     an article, more details,...Which
                                     the user wanna change
                                     the size any time.
                                   Steve Jobs wrote this quote above ">
                    </TextBlock>
                </ScrollViewer>
How can we change the size while scrolling ?!
we listened to ManipulationDelta event to do thatand here is the code:-
 private void ScrollViewer_ManipulationDelta_1(object sender,
             System.Windows.Input.ManipulationDeltaEventArgs e)
        {
            BottomGrid.Height -= e.DeltaManipulation.Translation.Y;
        }
what happens is we change the height of the bottomGrid, and the TopGrid will take the space.
Full Source Code:
https://github.com/mostafa-elabady/ScrollableContentWP8
Have fun :D
No comments:
Post a Comment